

Cart
0

Table of Contents
- Why Efficient Packing Changes Your Entire Hike
- Backpack Weight Distribution Guide: Where the Heavy Stuff Goes
- Essential Hiking Gear Checklist: What Earns a Spot in Your Pack
- How to Adjust Hiking Backpack Straps for a Balanced Carry
- Compression Sacks, Dry Bags, and Waterproofing Your Gear
- Accessible Gear, External Attachment, and Trail Readiness
- Packing for Your Climate, Body Type, and Pack Style
- Conclusion: Pack Once, Hike Better
- Frequently Asked Questions
Last Updated: October 3, 2026
Why Efficient Packing Changes Your Entire Hike
Learning how to pack hiking backpack efficiently is the difference between finishing a ten-mile day with energy to spare and quitting at mile six with aching shoulders.
The fix isn't buying more gear. Your pack is a system: weight distribution, strap adjustment, and gear access work together. Below, we'll build that system zone by zone, so weight rides on your skeleton instead of your shoulders.
Key Takeaway
Efficient packing is a weight-placement problem, not a gear problem. Get the heavy items high and close to your spine, and the same load will feel pounds lighter.
Backpack Weight Distribution Guide: Where the Heavy Stuff Goes
The core rule of a backpack weight distribution guide is simple: heavy items go high and close to your spine. That placement keeps your center of gravity over your hips, where your body is built to carry load. According to REI's expert advice on packing a backpack, positioning dense gear near your back's midline reduces the use that pulls you off balance.
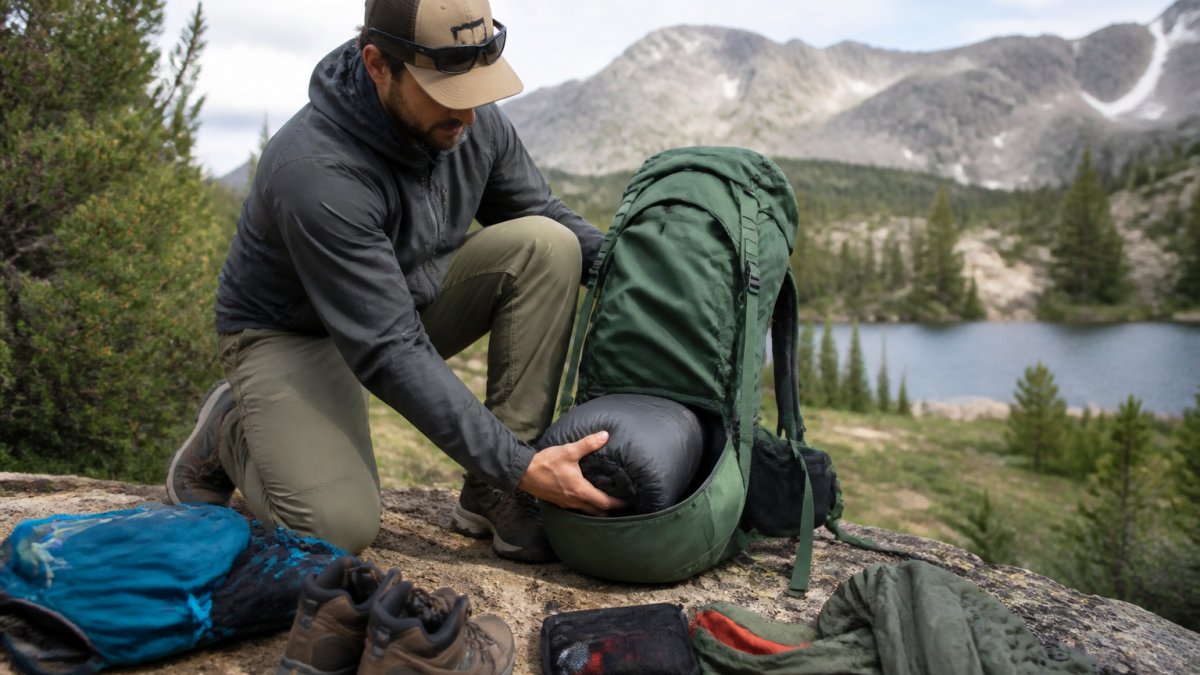
The Three-Zone Packing System
Think of your pack in three vertical zones. The bottom holds light, bulky items: sleeping bag, spare layers, camp clothes. The middle, pressed against your back, carries dense gear: food, cookware, water, fuel. The top takes daytime items plus anything light and awkward, like a bear canister.
This keeps the mass centered between your shoulder blades rather than sagging toward your lower back.
Center of Gravity and Lateral Balance
Forward-back placement is half the equation; lateral balance is the other half, and most hikers ignore it. If your stove sits left and your food bag right, the pack lists with every stride. Mirror heavy items left and right, a level pack is one you'll forget you're wearing.
Essential Hiking Gear Checklist: What Earns a Spot in Your Pack
An essential hiking gear checklist should answer one question per item: will I use this, or am I afraid not to have it? The ten essentials framework, long promoted by the National Park Service's hiking safety guidance, covers navigation, sun protection, insulation, illumination, first aid, fire, repair tools, nutrition, hydration, and emergency shelter. Everything else is optional weight.
- Navigation: map, compass, or charged GPS device
- Sun protection: sunscreen, sunglasses, hat
- Insulation: extra layer beyond what you're wearing
- Illumination: headlamp with spare batteries
- First aid: a kit sized to your trip length
- Fire: waterproof matches or a lighter
- Repair: multi-tool and tape
- Nutrition: more food than you plan to eat
- Hydration: water bottles or a hydration bladder
- Shelter: emergency bivy or space blanket
What to Ignore When Building Your Kit
A common mistake is packing for the trip you imagined rather than the trip you booked. Camp shoes, a second stove, and "just in case" clothing add bulk that raises base weight and pushes your center of gravity outward. If you haven't used an item on your last three trips, it stays home.
How to Adjust Hiking Backpack Straps for a Balanced Carry
Learning how to adjust hiking backpack straps correctly matters more than which pack you bought. A pack that fits your torso but is adjusted wrong still transfers weight to your shoulders, the most common cause of the mid-hike ache that cuts trips short. The goal is to move load onto your pelvis and use straps only to keep the pack stable.
The Adjustment Sequence: Heaviest Contact First
Adjust in order, because each strap changes the tension the next one needs. Loosen everything, load the pack to its real trip weight, then work through the sequence.
- Hip belt. Center the padding on your iliac crest, the bony ridge at the top of your hip. Tighten until snug but you can still slide a flat hand under the edge. This strap carries the majority of the load; if you feel weight on your shoulders, the belt is too loose or sitting too high.
- Shoulder straps. Snug to light contact. They shouldn't bear weight; they keep the pack from falling backward. If they dig into your collarbone, the pack is too short for your torso or the hip belt is too loose.
- Sternum strap. Fasten across your chest at roughly armpit height to stop the shoulder straps sliding outward and the pack swaying. Too high restricts breathing; too low does nothing.
- Load lifters. These small straps angle from the top of the shoulder straps to the top of the pack. Pull them to roughly a 45-degree angle to the shoulder strap, which tilts the pack top toward your shoulders and pulls the load's center of gravity forward and up. Never crank them fully tight, that pulls the pack off your hips and back onto your shoulders.
| Strap | What It Does | Adjustment Check |
|---|---|---|
| Hip belt | Carries the majority of load on hips | Sits on iliac crest, snug not tight |
| Shoulder straps | Stabilizes pack against back | Light contact, no weight bearing |
| Sternum strap | Prevents side-to-side sway | Level with armpits, not choking |
| Load lifters | Tilts top of pack toward shoulders | 45-degree angle, never fully tight |
Torso Length Changes the Whole Equation
Strap adjustment only works if the pack's torso length matches yours. Torso length is the distance from the C7 vertebra at the base of your neck to the top of your iliac crest, not your height.
If your torso is longer than the pack's range, the load lifters won't reach 45 degrees and the hip belt rides too high.
Reading the Feedback Your Body Gives You
Your body tells you which strap is wrong within the first mile. Learn the signals:
- Shoulders ache after an hour: the hip belt is too loose or sitting too high. Tighten it and reseat it on your iliac crest.
- Hips bruise or go numb: the hip belt is too tight or positioned over bone rather than the padded crest. Loosen slightly and shift it down.
- Pack sways side to side: the sternum strap is too loose or missing. Snug it to armpit height.
- Pack pulls you backward on descents: the load lifters are too loose. Pull them to 45 degrees.
- Lower back aches: the load is sitting too low. Move dense items up in the pack and re-tighten the load lifters.
Why This Matters for Injury Prevention
A pack that rides on your shoulders loads your trapezius and cervical spine with weight they aren't built to carry for hours, causing shoulder burn and, over a season, neck strain and lower-back fatigue.
Pack fit is a five-minute adjustment that changes your whole day. Do it at home with a loaded pack, then re-check after the first mile when the load has settled.
Compression Sacks, Dry Bags, and Waterproofing Your Gear
Compression sacks and dry bags solve two different problems, and hikers routinely confuse them. A compression sack squeezes loft out of a sleeping bag or puffy jacket, cutting volume so the load sits closer to your spine.
Waterproofing is a layering strategy: line your pack with a trash compactor bag or pack liner, put critical items in dry bags, and use pack covers for sustained rain.
Accessible Gear, External Attachment, and Trail Readiness
Accessible gear belongs on your body or in your pack's top lid and hip belt pockets, never buried.
External attachment is a trade-off, not a free upgrade. Strapping a tent or foam pad outside moves weight away from your spine, hurting stability, but frees interior space for dense items. Keep external loads low, tight, and symmetrical, nothing should swing, rattle, or catch on brush.
Packing for Your Climate, Body Type, and Pack Style
Most packing guides assume one hiker, one season, one body. The three-zone system is a framework, not a fixed recipe, how you fill the zones changes with the weather, your torso, and how light you're willing to go.
Winter: Bulk Management and Layer Access
Cold-weather packing inverts one rule: the gear you need most is the gear you need without stopping long enough to cool down. Insulation goes in last, near the top or in the top lid, so you can add a puffy layer at a rest break without unpacking.
Bulk is the enemy in winter. A 0-degree sleeping bag can eat a third of a 60-liter pack, so it goes in the bottom compartment in a compression sack.
Desert and Humid Climates: Water, Heat, and Weight Forward
In hot, dry conditions, water dominates your load. A liter weighs about 2.2 pounds, and a desert carry of four liters adds nearly nine pounds, enough to shift your center of gravity if placed wrong.
Humid climates flip the priority to ventilation and waterproofing. A pack cover traps heat against your back, so many hikers in wet, warm conditions line the pack interior with a trash compactor bag and skip the external cover.
Body Type: Torso Length and Hip Belt Geometry
Body type changes where the load should sit. Longer torsos can carry weight higher without losing balance, because the pack's center of gravity stays closer to their natural pivot point at the hips.
Hip belt geometry matters as much as torso length. Too narrow concentrates pressure and bruises; too wide wraps around the front of your hips and slips down.
Ultralight vs. Traditional: Same Rule, Different Scale
Ultralight packing strips the three-zone system down to a single stuff sack, but the center-of-gravity rule never changes: dense items still ride high and close to your spine. The difference is that ultralight hikers track base weight, pack and gear with no food, water, or fuel, and reduce it trip over trip.
In an ultralight setup, the sleeping bag and shelter often share one stuff sack, food goes in a bear hang or canister that doubles as the frame, and there's no separate sleeping bag compartment. The trade-off is durability and comfort margin: ultralight gear is less forgiving and leaves less room for the unexpected. Traditional packing keeps zones distinct and the comfort margin wider, at the cost of a heavier load.
Pro Tip
Weigh your packed pack before every trip and write the number down. Tracking base weight over a season is the fastest way to spot gear creep, the slow accumulation of items that quietly adds five pounds to a load you thought was dialed in.
Conclusion: Pack Once, Hike Better
The hardest part of packing isn't the technique, it's trusting that less gear and better placement will outperform more gear and brute force.
Granite Peak Gear Co. provides a comprehensive range of reliable gear, including backpacks, cookware, footwear, and tents, to ensure you explore the wilderness with confidence and comfort.
Get started with Granite Peak Gear Co. and pack once, hike better.
Frequently Asked Questions
Where should the heaviest items go in a hiking backpack?
Place the heaviest items, like your food bag, cookware, and water, in the middle of the pack, close to your spine and just below shoulder height. This keeps your center of gravity near your hips so the hip belt carries the load instead of your shoulders. Keep light items like your sleeping bag at the bottom and bulky layers at the top. A balanced pack reduces fatigue and improves stability on uneven ground.
How heavy should a 3-day hiking pack be?
Most hikers aim for a base weight (everything except food and water) between 15 and 25 pounds for a three-day trip. Add roughly 1.5 to 2 pounds of food per day and about 2 pounds per liter of water. Total pack weight often lands near 20 to 30 percent of your body weight. Ultralight setups can drop well below that, but comfort and safety gear matter more than hitting a number.
How do I adjust hiking backpack straps for better weight distribution?
Loosen everything first, then tighten in this order: hip belt, shoulder straps, load lifters, sternum strap. The hip belt should sit on your hip bones and carry most of the weight. Shoulder straps should hug your body without pinching. Load lifters, the small straps at the top of the shoulders, angle back at about 45 degrees to pull the pack close. Adjust the sternum strap so it sits across your chest without restricting breathing.
What should I pack in my backpack for a day hike?
A day hike pack should cover the ten essentials: navigation, sun protection, insulation, illumination, first aid, fire, repair tools, nutrition, hydration, and emergency shelter. In practice that means a map or phone, sunscreen, a light jacket, a headlamp, a small first aid kit, snacks, at least one liter of water, and a rain shell. Keep rain gear and snacks in an outer pocket or top lid so you can reach them without unpacking everything.

