

Cart
0

Table of Contents
- What Separates Backpacking Gear From Car Camping Gear
- Beginner Backpacking Checklist: What You Actually Need
- Best Backpacking Backpack for Beginners: Fit and Sizing
- Backpacking Sleeping Bag and Pad: Temperature Ratings and Comfort
- Budget Backpacking Gear: Where to Save and Where to Spend
- Navigation, Lighting, and Safety Gear for Beginners
- How to Choose Gear for Trip Length, Season, and Conditions
- Frequently Asked Questions
Last Updated: October 7, 2026
What Separates Backpacking Gear From Car Camping Gear
Backpacking gear is equipment designed to be carried on your back for miles, so every item earns its place through low weight and packability.
That distinction drives every beginner decision. At Granite Peak Gear Co., we see new backpackers copy car camping setups, then abandon half of it at mile three.
Weight compounds: a stove a few ounces heavier feels fine in your hands and miserable after eight miles.
Key Takeaway
The test for any item is simple: would you carry it uphill for ten miles in the rain? If the answer is no, it belongs in a car camping kit, not a backpack.
Beginner Backpacking Checklist: What You Actually Need
A complete beginner backpacking checklist covers the Big Three (pack, shelter, sleep system), plus water, cooking, navigation, light, and weather protection. Everything else is optional until you know your style.
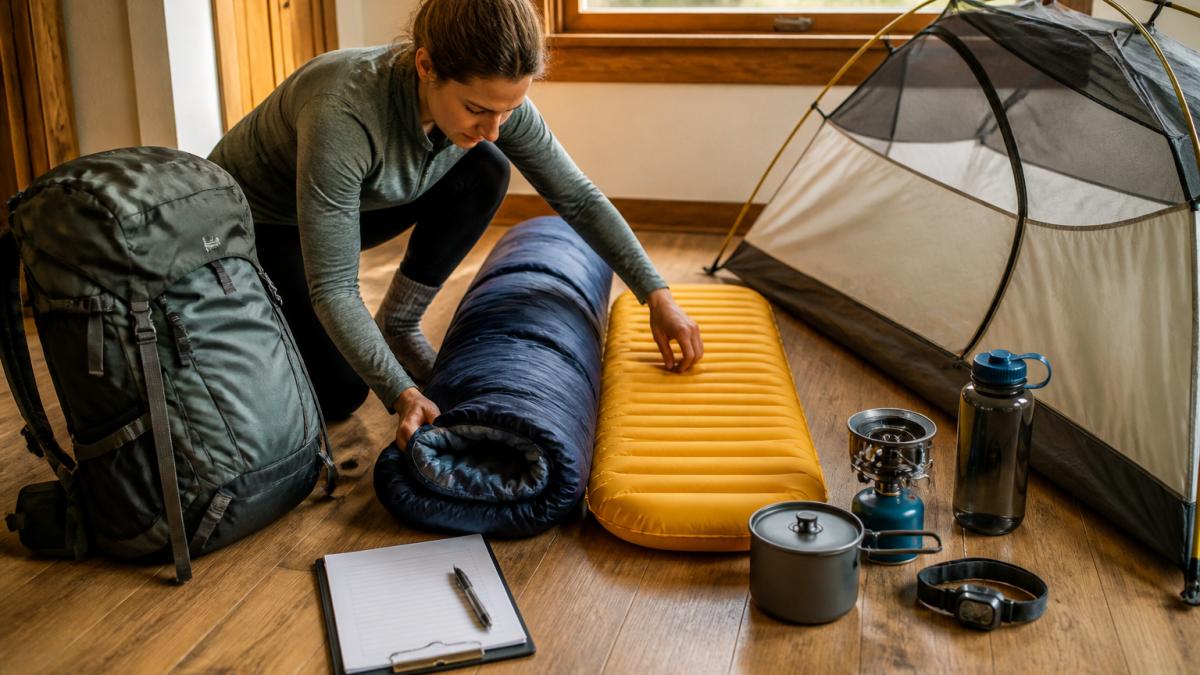
Most first-trip failures come from packing too much, not too little. The fix is a prioritized list, sorted into three tiers before you pack.
Tier 1, Carry or cancel the trip. These items keep you alive and functional if weather turns or you get off route:
- Backpack with a padded hip belt that transfers most of the load to your hips
- Shelter (tent or tarp) rated for the rain you might actually hit, not the worst storm imaginable
- Sleep system (bag plus pad) matched to the nighttime low you expect, minus a margin
Tier 2, Carry if the trip is more than one night. These items make multi-day trips workable:
- Stove and fuel if you plan hot meals or need to boil water for treatment
- Extra food, roughly one day's surplus for a two-to-three-night trip
- Repair kit, pad patch, tent pole splint, duct tape, needle and thread
Tier 3, Leave home on your first trips. These are the items beginners most often pack and never use:
- Camp shoes, camp chair, pillow (a stuff sack of clothing works)
- Full cook set with multiple pots, plates, and bowls
- Backup stove, backup shelter, backup anything beyond a light
Match the Checklist to Your Trip
The same checklist produces different packs depending on three variables: nights out, nighttime low, and how wet the route can get. Use this as a starting frame:
| Trip | Pack size | Sleep system | Shelter |
|---|---|---|---|
| One summer night, dry | 35-45L | 40°F bag, R-value 2 pad | Tarp or single-wall tent |
| Two to three nights, mixed | 50-60L | 30°F bag, R-value 3-4 pad | Three-season double-wall tent |
| Four-plus nights or shoulder season | 65-70L | 20°F bag, R-value 4+ pad | Sturdy three-season tent |
| Cold nights or exposed terrain | 70L+ | 10-20°F bag, R-value 5+ pad | Four-season or reinforced shelter |
New backpackers often buy for the trip they hope to take, then find the gear wrong for the trip they actually take. Buy for the next twelve months, not the dream trip three years out.
The Big Three: Pack, Shelter, Sleep System
Your pack, shelter, and sleep system carry the most weight and cost the most, so they deserve the most thought. Get these three right and the rest falls into place.
The pack must fit your torso length, not your height. A shelter should match expected weather, not the worst storm imaginable. Your sleep system must keep you warm at the lowest temperature you will realistically face, usually colder than you expect at elevation.
Essential Items Beyond the Big Three
Beyond the Big Three, focus on water, food, light, and safety. These items are lighter and cheaper, but skipping them turns a fun trip miserable.
Carry a water bottle or bladder, a way to treat stream water, a headlamp with spare power, a small first aid kit, and a repair patch for your pad or tent.
Key Takeaway
Weigh your Tier 1 items first. If your base weight, everything except food, water, and fuel, is over about 20 pounds for a three-season trip, look for items to cut or swap before you add anything from Tier 2.
Best Backpacking Backpack for Beginners: Fit and Sizing
The best backpacking backpack for beginners fits your torso, carries 50 to 70 liters for multi-day trips, and has a padded hip belt that puts most of the load on your hips. Fit matters more than brand or price.
Pack size depends on trip length: a 35L pack suits an overnight or fast summer trip, while a 70L pack handles multi-day trips with food and a bear canister. Here is how we match capacity to your plans:
| Trip Type | Suggested Pack Size | Why |
|---|---|---|
| Overnight, summer | 35-45L | Light load, minimal food |
| 2-3 day trip | 50-60L | Room for food and layers |
| 4+ day trip | 65-70L | Food volume and cold-weather gear |
| Winter or gear-heavy | 70L+ | Bulky insulation and extra fuel |
Large-Capacity Water-Resistant Multifunctional Hiking Backpack
Our top pick for beginners is the Large-Capacity Water-Resistant Multifunctional Hiking Backpack at $131.67. The nylon build resists splashes, the 70L capacity covers multi-day trips with room to spare, and it ships with a rain cover.

The one drawback: 70L is more space than a single overnight needs, and an oversized pack invites overpacking. If your trips are short, size down.
Outdoor Mountaineering Bag 35L Hiking Large Capacity Backpack
For shorter trips, the Outdoor Mountaineering Bag 35L at $74.91 keeps your load honest. The nylon shell and 35L capacity suit overnighters and fast summer trips with minimal food.
What most guides miss: a smaller pack forces better decisions. You cannot overpack what will not fit.
Pro Tip
Load your pack at home, then walk a mile around your neighborhood. If the hip belt digs in or the load shifts, adjust before you reach the trailhead. Ten minutes of testing saves a day of shoulder pain.
Backpacking Sleeping Bag and Pad: Temperature Ratings and Comfort
A backpacking sleeping bag and pad work as a system: the bag traps heat and the pad stops it leaking into the ground. A great bag on a bare floor still leaves you cold.
Temperature ratings tell you the lowest temperature a bag handles, but treat them as a starting point, if you sleep cold, choose a bag rated below your expected low.
Four-Season Lightweight Warm Single-Person Camping Sleeping Bag
The Four-Season Lightweight Warm Single-Person Camping Sleeping Bag at $18.56 uses fleece fill and lining in an envelope shape for adults.
Where it falls short: a fleece bag is warm and comfortable but bulkier than a down bag at the same rating. Pair it with a quality pad, since the pad does the heavy lifting on cold ground.
Budget Backpacking Gear: Where to Save and Where to Spend
Budget backpacking gear works when you spend on the items that carry you and save on the items that support you. Splurge on your pack and sleep system; save on cookware, poles, and accessories.
Here is how we would split a first-trip budget:
Large-Capacity Water-Resistant Multifunctional Hiking Backpack →
- Spend: backpack, sleeping pad, shelter (these decide comfort and safety)
- Save: cookware, trekking poles, headlamp, small accessories
- Borrow or rent first: tent and bag, until you know your size and season
Camping Mountaineering Rain-proof Camping Tent
The Camping Mountaineering Rain-proof Camping Tent at $297.41 is our shelter pick for beginners who want one tent that handles real weather. The 20D silicone nylon fly and floor carry 4000mm and 3000mm waterproof ratings, 7001 aluminum alloy poles keep weight down, and the package includes a floor mat, stakes, wind rope, and storage bag.

A common mistake is buying a tent rated for a calm summer night, then meeting a mountain storm. This one is built for the wetter end of three-season use.
Ultra-light Foldable Outdoor Camping Cookware and Widesea Cookware Set
Cooking gear is where beginners overspend. Two options cover almost every trip: the Ultra-light Foldable Outdoor Camping Cookware at $70.04, a titanium alloy set for one to two people with windproof, heat-gathering design, and the Widesea Outdoor Camping Cooking Cookware Set at $40.94, an aluminum two-piece pot set that doubles as pot or bowl.

If you boil water and rehydrate meals, the Widesea set is enough. If you cook real food and count grams, the titanium set earns its price.
Watch Out
Buying the cheapest stove and pot combo often means replacing both within a season. A warped pot or a stove that will not light in wind costs you hot meals on the trip you planned for months.
Navigation, Lighting, and Safety Gear for Beginners
Navigation, lighting, and safety gear keeps a small problem from becoming an emergency. None of it weighs much, and all of it matters when the sun drops or the trail fades. What matters is knowing what each item is for and what to do when it fails.
Navigation: Two Independent Systems
Carry a paper map and compass even if you use a GPS or phone app, since batteries die and screens crack. The map and compass are your primary system; the phone is a convenience.
A common pattern is for beginners to rely on a phone app until it dies at the worst moment. Two habits prevent that:
- Download offline maps for the entire route before you leave cell coverage
- Carry a small power bank sized to recharge your phone at least once
If you are navigating by phone, keep it in airplane mode to stretch the battery. If you are navigating by map, keep it in a zip-top bag or map case so rain does not turn it to pulp.
Lighting: Two Lights, Not One
A headlamp keeps your hands free for cooking, pitching shelter, and reading a map. Buy two small headlamps instead of one big one, a backup weighs almost nothing and saves a night when the first dies. Carry spare batteries or a matching charging cable, and test the light at home before every trip.
Repair and Contingency Gear
This is the category most beginner lists skip, and where a small problem either stays small or ends the trip. A three-season repair kit can weigh under half a pound and cover the failures that actually happen:
- Pad patch or a few drops of seam sealant for a pinhole leak
- Tent pole splint, a short length of aluminum tubing that slides over a broken pole section
- Duct tape wrapped around a trekking pole or water bottle, not carried as a full roll
A common failure is a pad that develops a slow leak on night two. Without a patch, you sleep cold and may cut the trip short; with one, you are back in your bag in ten minutes.
First-Aid and Emergency Essentials
A backpacking first-aid kit is not a car kit. Keep it small, focused, and reachable without unpacking your whole bag. A reasonable starting kit includes:
- Adhesive bandages in several sizes, plus blister care (moleskin or hydrogel)
- Gauze pads and medical tape
- Antiseptic wipes and antibiotic ointment
Beyond the kit, three items belong in every beginner's pack:
- A way to signal, a whistle, a mirror, or a bright-colored item you can wave
- A way to stay warm if you stop, an emergency blanket or an extra insulating layer
- A written trip plan left with someone at home: route, expected return time, and who to call if you are late
The trip plan is the cheapest safety item you own and the one beginners skip most. It costs nothing and turns a search into a rescue.
Weather and Water Contingencies
Two contingencies cover most bad days. First, weather: check the forecast, but plan for it to be wrong. A rain shell and a dry bag for your sleep system and spare clothes keep a wet afternoon from becoming a cold night. Second, water: know your next reliable source and carry enough to reach it. If a source is dry, a map showing alternatives is worth more than any filter.
Watch Out
Do not rely on a single navigation tool, a single light, or a single way to treat water. Redundancy on the items that keep you found, warm, and hydrated is not overpacking, it is the difference between a story and an incident.
The Leave No Trace Seven Principles guide the ethics of packing and camping, and the U.S. Forest Service recreation safety guidance covers backcountry basics worth reading before your first trip. For weather planning, the National Weather Service forecast tools help you match gear to the conditions you will actually face.
How to Choose Gear for Trip Length, Season, and Conditions
Choosing gear for trip length, season, and conditions comes down to three questions: how many nights, what is the nighttime low, and how wet can it get.
Trip length sets pack size and food volume. Season sets sleep system rating and clothing layers. Conditions set shelter and rain protection.
- Short and dry: smaller pack, lighter bag, minimal rain gear
- Long and wet: larger pack, waterproof shelter, rain shell, dry bags
- Cold nights: warmer bag, higher R-value pad, insulating layer
Pack weight and gear-system planning tie it together.
Renting, borrowing, and buying used is a smart first step. Rent a tent and bag, borrow poles, buy used cookware.
The Leave No Trace Seven Principles guide the ethics of packing and camping, and the U.S. Forest Service recreation safety guidance covers backcountry basics worth reading before your first trip. For weather planning, the National Weather Service forecast tools help you match gear to the conditions you will actually face.
Frequently Asked Questions
What backpacking pack is best for a beginner?
For a first multi-day trip, a 50 to 70-liter pack fits most beginners. The Large-Capacity Water-Resistant Multifunctional Hiking Backpack holds 70 liters and includes a rain cover, which works well for 2 to 4 night trips. A 35-liter pack like the Outdoor Mountaineering Bag suits overnighters or ultralight setups. Get fitted in person if you can, and test the pack with weight before your trip.
How much should a beginner spend on backpacking gear?
You can build a solid starter kit for under $500 if you prioritize the big three: pack, shelter, and sleep system. Budget backpacking gear does not mean cheap gear. Focus spending on your backpack and sleeping bag, where fit and warmth matter most. Rent or borrow specialty items like bear canisters first, then upgrade as you learn what you actually need.
How do you choose a sleeping bag and sleeping pad for backpacking?
Match your sleeping bag's temperature rating to the lowest overnight temperature you expect, then subtract 10 degrees for safety. A fleece-lined envelope bag like the Four-Season Lightweight Warm Single-Person Camping Sleeping Bag works for mild to cool conditions. Pair it with a sleeping pad that has an R-value of at least 2 for three-season trips. The pad insulates you from the ground, which matters as much as the bag itself.
What backpacking gear can beginners borrow or rent?
Tents, sleeping pads, bear canisters, and trekking poles are the easiest items to borrow or rent for a first trip. Many outdoor groups and university rec programs lend gear to members. If you are unsure whether you will stick with backpacking, rent before you buy. Once you know your preferred trip style and season, invest in your own pack and sleep system.
What should a beginner pack for an overnight backpacking trip?
Start with the big three: a properly fitted backpack, a shelter like the Camping Mountaineering Rain-proof Camping Tent, and a sleep system. Add a stove and cookware such as the Ultra-light Foldable Outdoor Camping Cookware, a headlamp, water bottles or a bladder, layers including a rain shell, and navigation tools. Keep your pack under 30 pounds for a first trip. Weigh everything at home before you leave.
Backpacking rewards preparation, and the gap between a great trip and a miserable one usually comes down to gear you trusted. If you are building your first kit, start with the Big Three and let the rest follow. Granite Peak Gear Co. stocks the packs, tents, cookware, and lighting that beginners actually need, backed by fast shipping, a quality promise on premium products, and hassle-free returns. Add to Cart and get the gear that keeps you warm, protected, and ready for the trail.

